1 - First pipeline
Compile your first pipeline
You should now be able to see and login into the Gaia user interface. At the top you should see a blue button “Create Pipeline”.

If you click on it, you should be redirected to the create pipeline view.
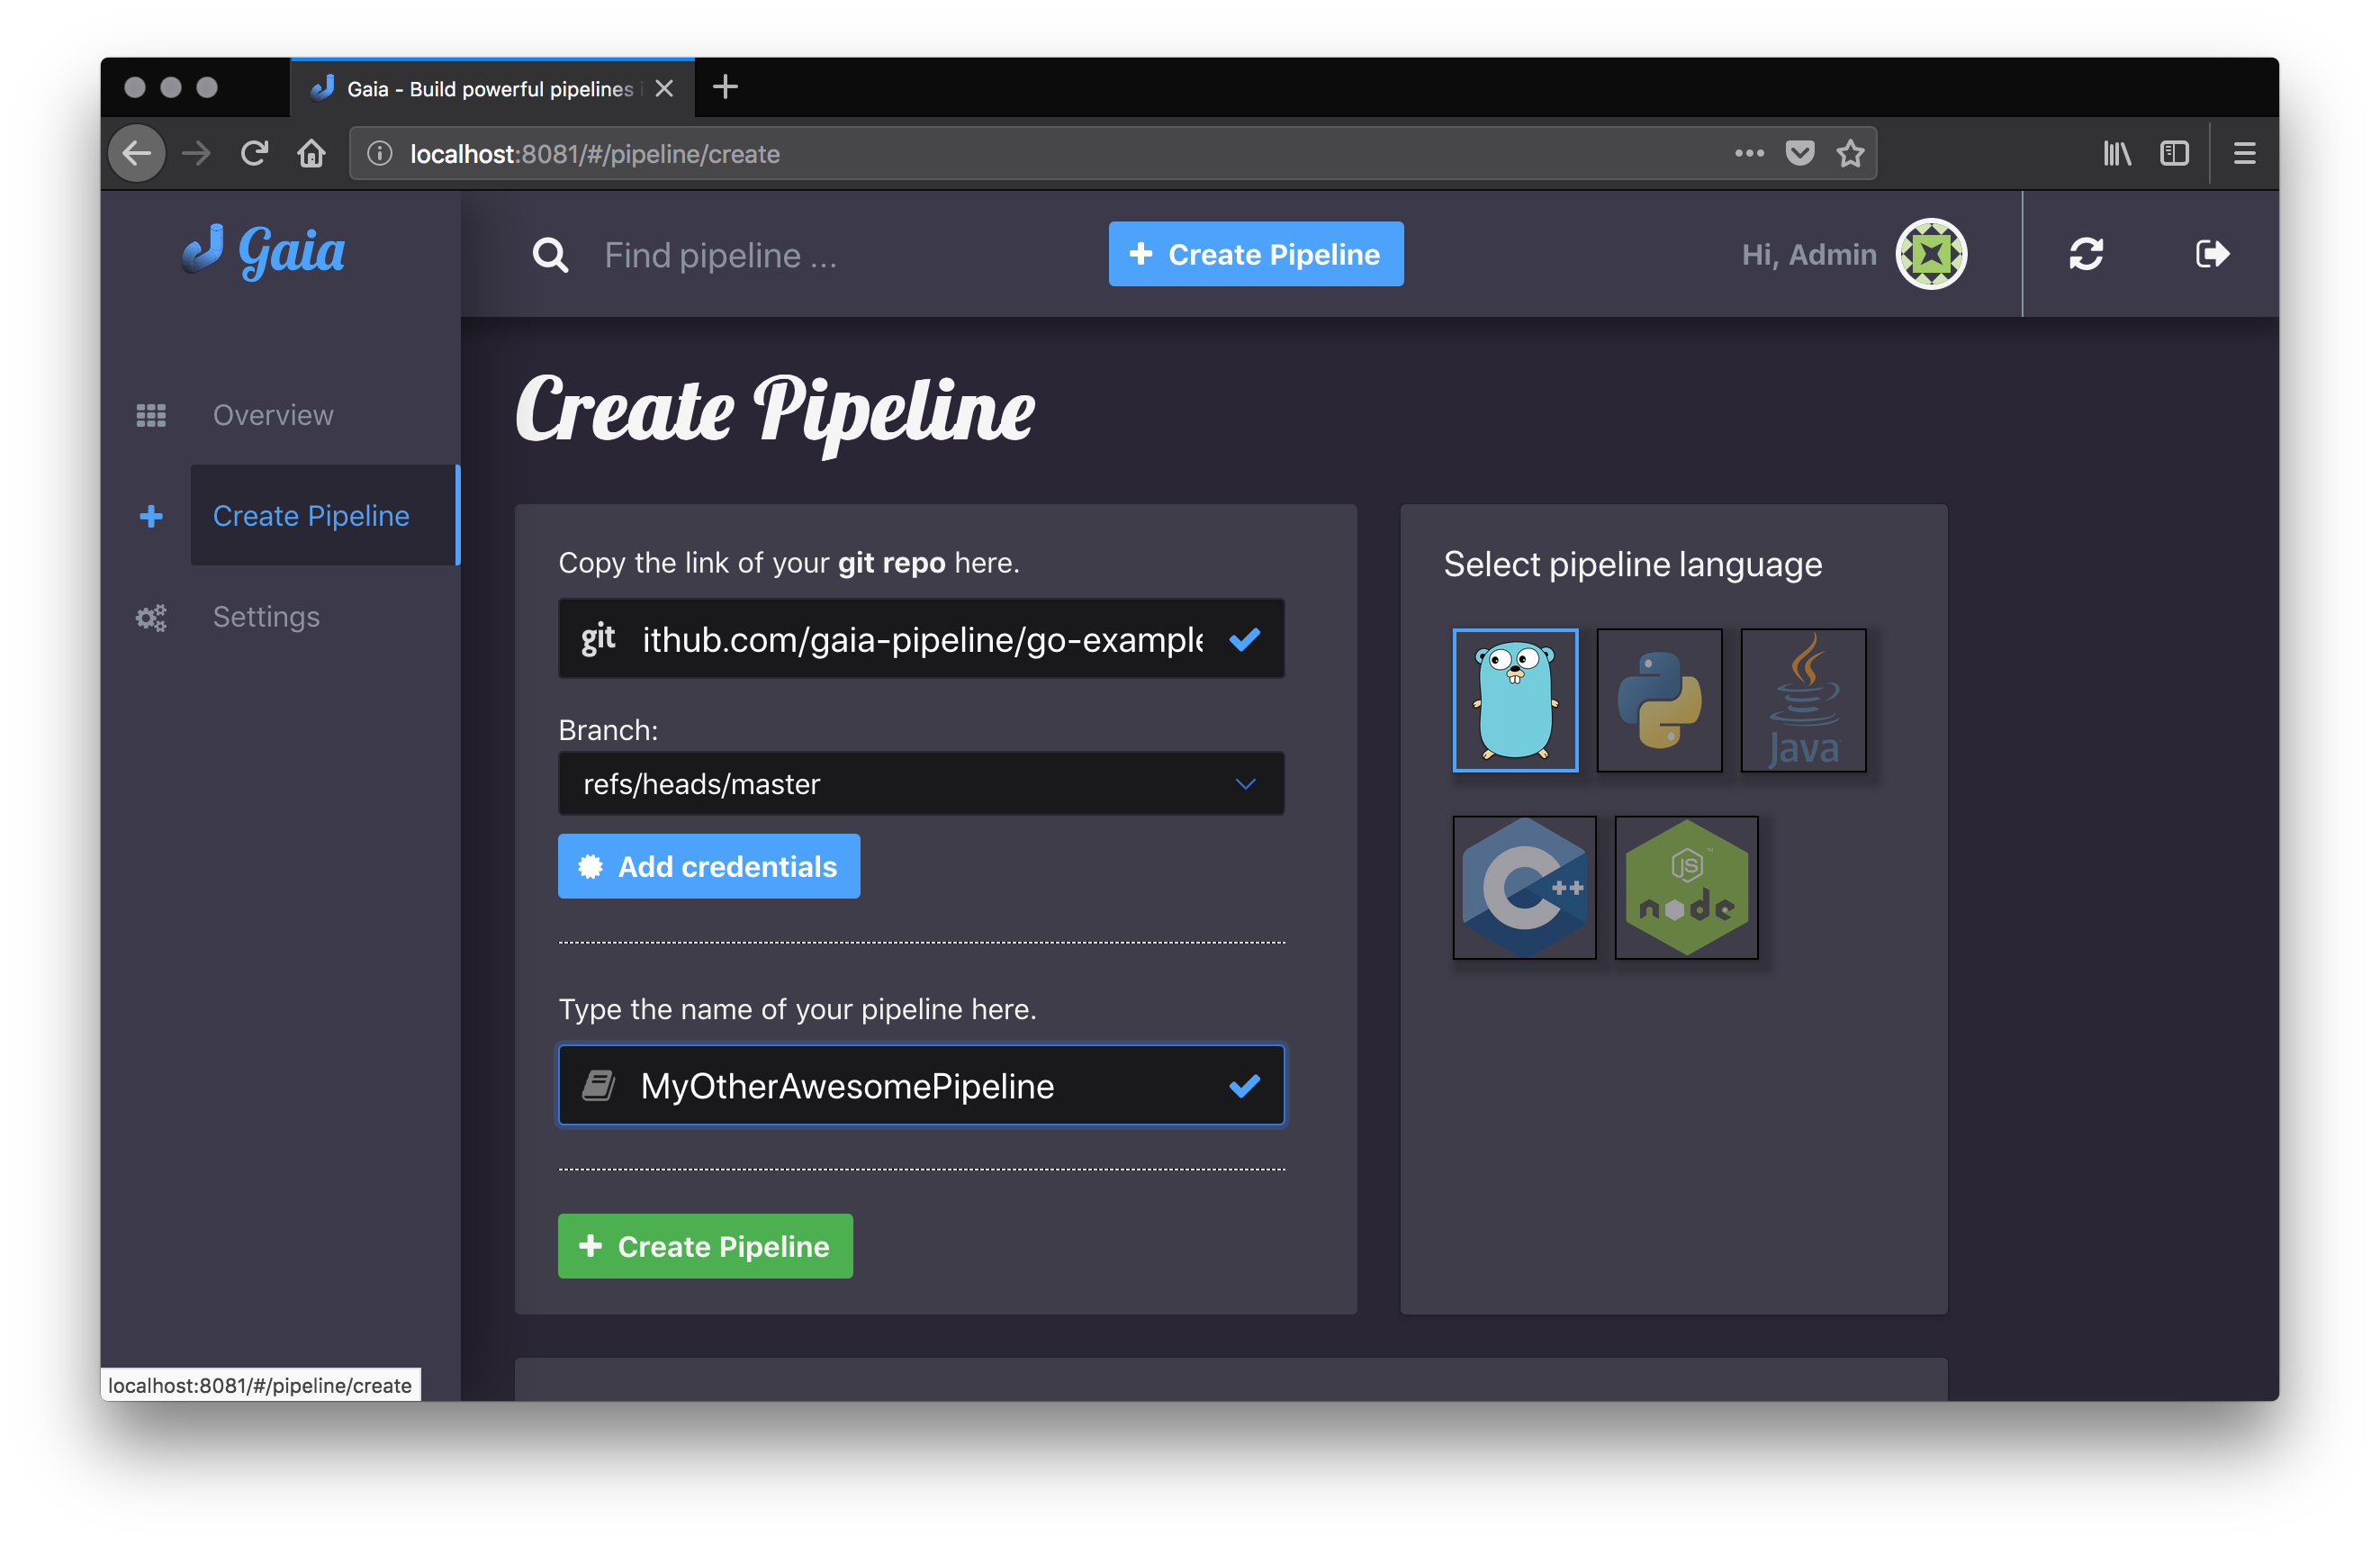
The first input field is the place where you tell Gaia which git repository should be cloned. For now you can use our example go pipeline. Just paste https://github.com/gaia-pipeline/go-example into it. Gaia automatically looks up the repository and finds out which branches are available. By default, the master-branch is selected if available.
The next input field determines what Name your pipeline should have. We all know naming things is hard but try to find a name which is short, unique and even after a long period of time you know what the pipeline does.
On the right side you choose the programming language for your pipeline. By default it is go.
Click on “Create Pipeline” when you think you have filled all required fields.
Start your compiled pipeline
After a few seconds you should see your pipeline in the history table (below on the same page). It should show you the compile status, type, creation date and a green button with the label “Show output”. When you click on this button it should display you the log output of the pipeline compilation.
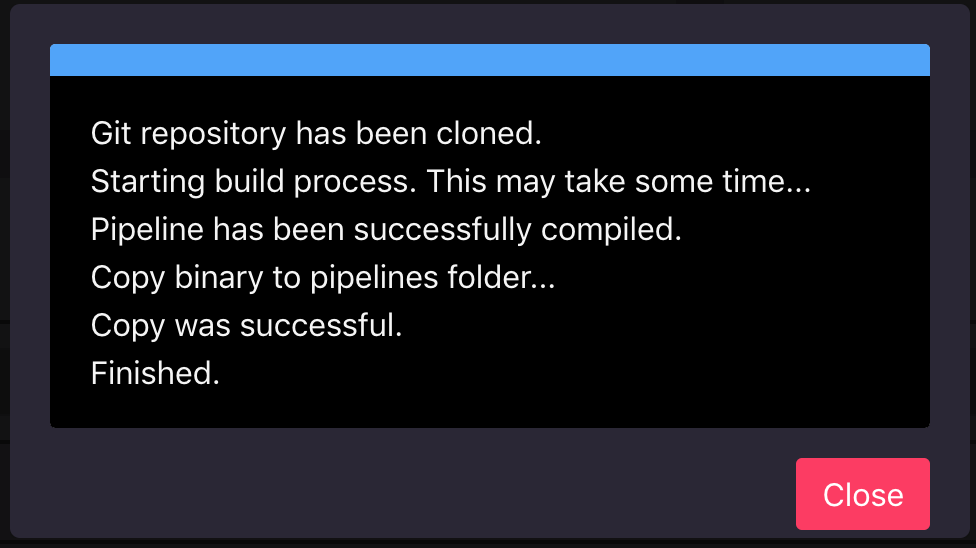
Wait until your pipeline has been compiled and moved to the pipelines folder. It should have the status “success” when the process has been finished.
Now click in the left main menu on “Overview”. This is the place where all known pipelines are displayed. It should now also display your created pipeline. Click now on the “Start Pipeline” button and continue with the next step.